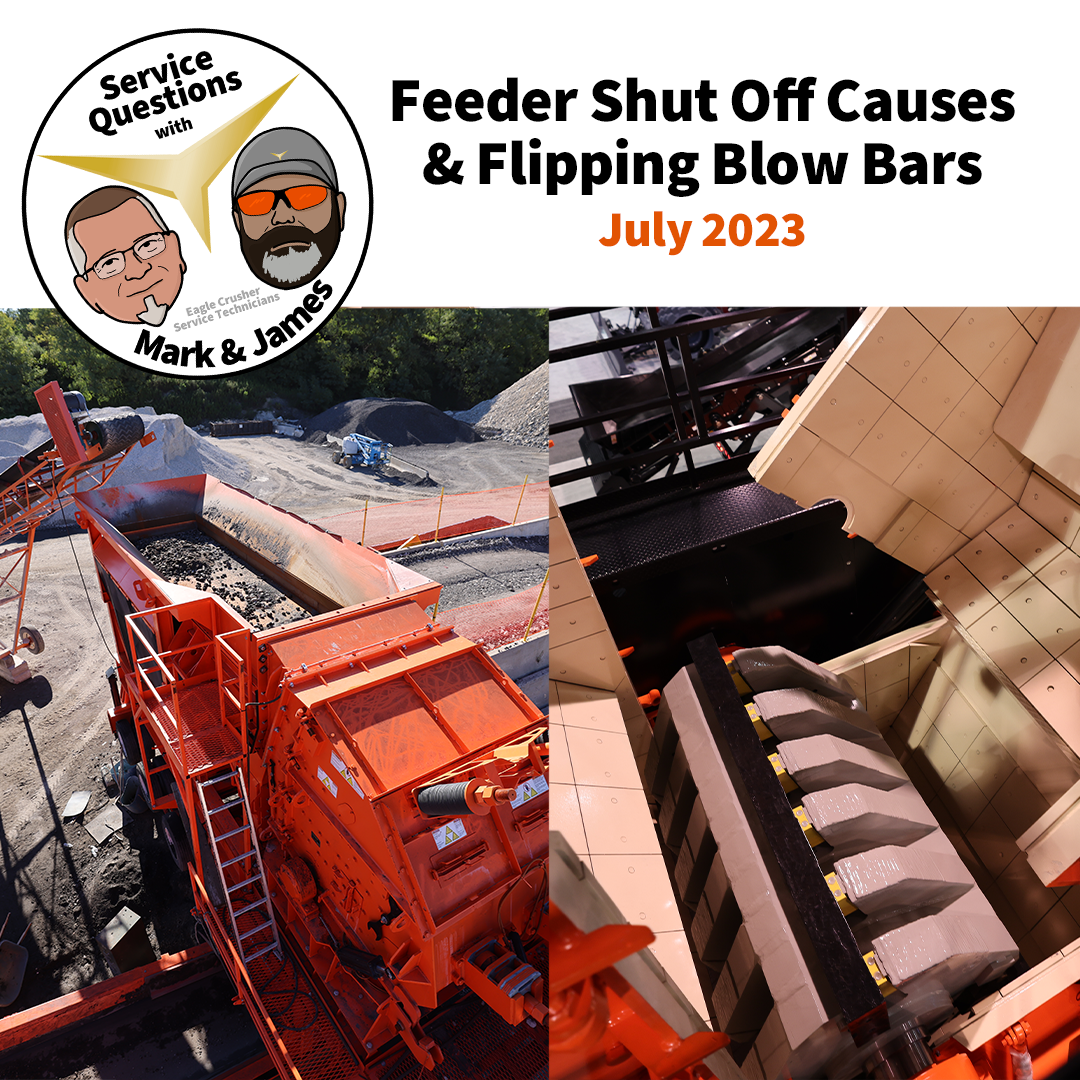
Blog
Service Questions: When to Flip Blow Bars and Troubleshoot Impact Crusher Feeder Problems
Businesses today are increasingly relying on the expertise and recommendations of service technicians to optimize their operations. These skilled professionals have a wealth of knowledge and hands-on experience, allowing them to identify potential issues, offer practical solutions, and suggest improvements tailored to operational needs.
Ready to see the insights Eagle Crusher’s service technicians bring to the table? Check out our conversation below with Mark and James, which will help you enhance efficiency, streamline your processes, and ultimately deliver better products and services to your customers. Today’s service questions feature feeder shutoff issues and blow bar maintenance.
Feeder Shutting Off? Common Questions and Fixes
Question: Why does my feeder keep shutting off?

Service: Are you hearing an alarm? There is a low voltage alarm on your panel—is there a yellow light lit up on the front of your panel?
If you hear an alarm and the light is lit up, most likely it’s indicating the drive belts on your unit have slipped due to the natural wear of stretching. When this happens, it causes the generator to run at a lower RPM so it will not produce the minimum of around 480 volts required to run the components on the crusher. Since the last component started was the feeder, it is going to be the first component to shut off. If voltage continues to drop, then the next to last component that was started will shut off and so on and so forth. Impact crusher feeder problems like this are common when belt tension isn’t properly maintained.
Q: What is the proper belt tension?
Service: Proper belt tension can be achieved by referencing a chart we have to offer and is also located in your Operators Manual, so you can check the belt deflection for each individual belt. Please note that sometimes you may have the proper tension on belts, but the sheaves on your unit will also wear, which doesn’t allow the belt to grab the groove properly. This phenomenon will also cause slippage. The grooves on your sheaves can be checked with a sheave gauge that you can purchase from companies like Motion Industries or Bearings Inc. or Martin.
Q: What if I checked my voltage and I am reading 485 volts AC, which is above the 480-volt minimum?
Service: It is possible that you may not have enough voltage going to your feeder starter holding contact (AKA Auxiliary Contact). These are the red wires in your panel that go to the auxiliary contacts. They should have and maintain 120 volts AC. The auxiliary contacts are mounted on the side of all the starters in your panel. If it does not maintain the full 120 volts AC the connection will not hold and pass the power on to the next starter. It is possible you have enough voltage to hold the other starters in and just not enough to hold and maintain the feeder starter in, since it is the last one in the line.
Q: If I checked that all the voltages are where they should be and I’m still having issues, what would my next step be?
Service: It might be that your feeder stop button’s contact, located on your remote panel on the operator’s platform, is full of dirt, ice, or other debris. The vibration of the machine along with the limited travel distance to the inside button may not complete the circuit therefore degrading the power to the feeder.
Q: If I tried all the above steps and am still having issues, what should I do?
Service: Give us a call! We’re available 24/7 to help walk you through any feeder shutting off issues you might have.
When to Flip Blow Bars and Understanding Blow Bar Wear Measurement
Q: How do I know when to flip blow bars?
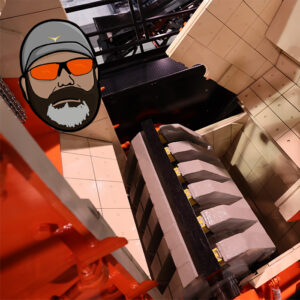
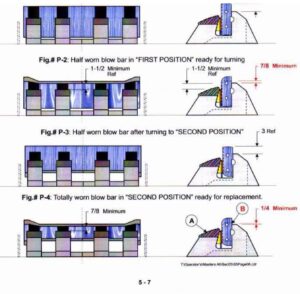
Service: The best way to know is to check the level of wear on your blow bars. The proper way to check wear on your blow bar is by measuring from the top of the rotor to the top of the blow bar in each blow bar location. The measurement should be taken on the top side of the rotor on the locking rod side of the blow bar. The locking rod runs through the back side of the blow bar which locks the blow bar to the rotor. Below is a chart showing measurements that will help you know when to flip/change your blow bar.
Q: How do I check for wear?
Service: At the end of every workday the blow bars should be checked for wear. Before checking blow bar wear make sure the power source is locked and tagged out. Then loosen all impactor lid locks and flip them open. Once that is done you can start the motor to the hydraulic pump. Open the impactor lid using the correct lever that is labeled IMPACTOR LID near the impactor. After the impactor lid is opened all the way, insert impactor safety lock located near the impactor lid pivot arms. Then position the rotor and insert the rotor safety lock located to the left of the rotor hanging on the stationary end of the impactor. Now you are ready to check the blow bar wear measurement on each bar.
Q: What happens if only one blow bar needs to be replaced? Should I replace them all anyways?
Service: Your blow bars may wear unevenly so make sure you measure the lowest point to ensure no damage will be caused to your rotor. Each blow bar can be flipped one time, when the wear has met the measurements on the chart. Blow bars must remain within 4 to 5 pounds of each other otherwise damage to bearings occurs from vibration. DO NOT replace just one bar. You should always replace them in sets.
Q: Where can I get more blow bars?
Service: Contact our parts department for recommendations on the best blow bars for your equipment. It is also recommended to have extra blow bars on hand so you can minimize your downtime.
Q: What if I need more help with changing the blow bars?
Service: Reach out to us! We’re available 24/7 for all your blow bar questions.
Need Help? Our Service Experts Are Ready
Mark and James have seen these issues countless times and know exactly how to fix them. Whether you’re not sure how to do a proper blow bar wear measurement or your feeder is shutting off, Eagle’s service department is always available to take your call. Contact us today and let our team help you optimize your operations with the right expertise and parts!