Blog
Service Questions: Feeder Leaking Oil & Deister Pivoting Motor Base Install

Service Questions with Mark & James: Feeder Leaking Oil & Deister Pivoting Motor Base Install
This month’s Service Questions is a celebration of the spirit of lifelong learning—a call to arms for all those who believe in the infinite capacity of the human mind to absorb, adapt, and evolve. It’s an invitation to embrace every chance to learn, grow, and thrive, no matter where life has placed you. After all, every day brings with it the promise of new discoveries, fresh perspectives, and the chance to become the best version of ourselves. Join Mark and James as they dive into the topics of feeders leaking oil and how to properly install diester pivoting motor bases.

My feeder is leaking oil. What is wrong with it?

Service: There are two reasons your feeder may be leaking oil: the feeder is not level, or the oil level is incorrect.
Q: How do I check if the feeder is level?
S: You would need to check the level of your feeder, not just the machine. The best way to check if your machine is level is by putting a 2- or 3-foot level on the bottom of the feeder drive assembly. If it is unlevel, you will need to stop operating and level the machine using its hydraulic legs or adjust its cribbing.
Q: What should I check for to make sure the oil level is correct?
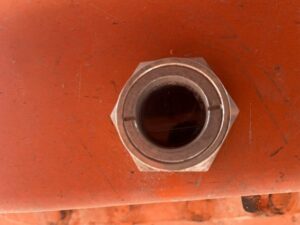
S: The best time to check the level is in the morning before you start the unit. Full in most cases is halfway up the site glass. Note don’t check the oil level until after you level your machine. On an Eagle Crusher 1200 unit (link) the amount of oil is said to be 10.4 gallons. In some cases, after draining the oil you may find that 10.4 gallons may be a little high in site glass. The cause for this is the residual oil that did not drain out completely.
Q: What should I do if I still have questions?
S: Reach out to us! We’re available to answer all questions you might still have.
Question: How do I properly install my Deister pivoting motor base?

Service: Step #1, make sure all energy sources have been properly locked out and tagged out.
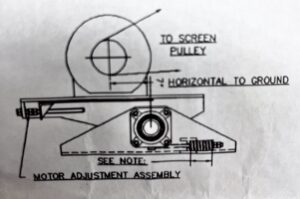
Step #2, set the pivot base on a flat and stable surface. I recommend using a c-clamp to secure pivot base to your flat surface. Block the upper pivot base angles so that upper base is parallel with lower base.
Step #3, now it is time to set your motor on your pivot base. There are 2 straps connected to your upper portion of the base. These are used for adjusting the position of your motor on your pivot base. There are holes in the straps for mounting motor. I recommend using a tape measure to find the center of the adjustment straps so you can get both straps equal. Also find the center of the lower base and put a visible line that you can use when finding proper location of the motor on the base. Now that you have found the center of both upper straps and lower base you can adjust the straps to achieve your 1″ to 2″ off center. Note: You need to have the 1″ to 2″ off set, set toward the adjustment strap bolts. Now you can set your motor and tighten the bolts that secure the motor to the straps and upper portion of the pivot base.
Step #4, install the pivot base with motor to your motor platform. With proper rigging and procedures, place your pivot base with motor on your motor platform with your tensioning rods facing the discharge end of your feeder. Install your bolts that will secure your pivot base to the platform, do not tighten bolts completely.
Step #5, using a come along lift the upper pivoting portion with motor so that you can install belt. After the belt is installed, you will need to use a come along to pull pivot base with motor back until your upper base angles are parallel with lower base angle as shown above. Once you have done this you can tighten bolts to secure pivot base to platform.
Step #6, tightening tension springs. The tension springs are on the lower portion of your pivot base. Loosen jam nut and tighten both springs until you have compressed spring to between 3 1/8″ -3 7/8″. It’s time to test run. I recommend you start spring compression at 3 7/8″ if motor has more than 1″ of motion once feeder is up to full speed, tighten spring till you achieve no more than 1 inch of movement when your feeder is at full speed.
If you have any questions about the above steps, reach out! It’s always better to ask questions before rather than after.
Remember, the journey of learning is not bound by age or job title; it’s a path open to all who dare to walk it. We hope you enjoyed this journey with us, unlocking the boundless potential that lies within learning from our experienced Service Technicians. If you have any questions that you want us to answer, just contact us and we’d be happy to help you.